Mud Box
Mud Box

uI Agree!
uSet language on the first open.
uSet your working files to the D drive on the machine. Please do NOT leave this on your H drive default. Will cause you problems in future.

uChoose directory (D:) and double click on it.
uI had to use (C:) for this Powerpointas my machine lacks a D drive.
uStart Menu – Programs – Autodesk Mudbox2018 – Mudbox2018
 uInside the D: drive, Right Click and select New Folder.uuName this folder with your name.uuIf you already have a folder with your name on this machine you are using, you do not need to create one, just skip this step.
uDouble click on your new or old folder with your name to open it.
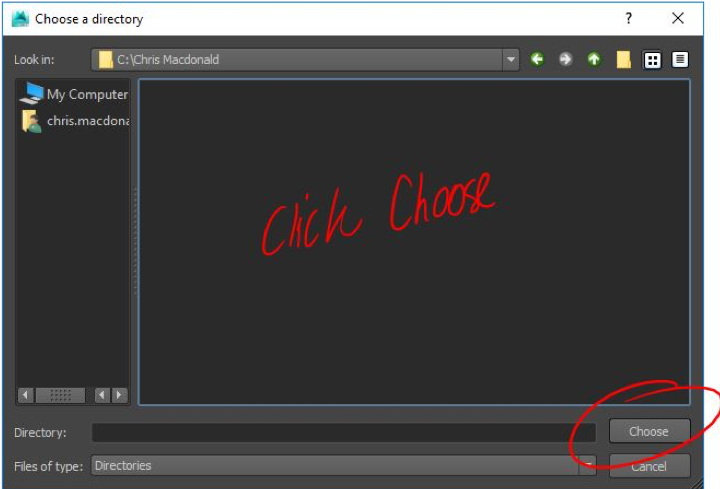
uWhile inside this folder, click Choose.uYou will be taken back to….
 u….this screen.
uPress OK
uMudboxwill create its folder structure in that selected folder as it opens.

uThe splash screen will appear as Mudboxopens. Several windows will appear, each with a tick box to “Show Again” at start up.
uSadly, with how things work on the network and your logins, unticking these will not make them go away on most occasions


uAnother window that will haunt you.
uNow that Mudboxis opened and the annoying but sometimes useful windows have gone, you can select some presets, watch some videos or open an older file.
uFor today, we will use the “Basic Head” for practicing on.


uFamiliarise yourself with some of these key features.
uLayers (like Photoshop)uTools (location and tabs)u3D View (in case you end up in some weird window by accident)uBrush size / strength and optionsuCamera view and angle box
uRemember to create layers while playing around.
uYou can delete them if you make a mistake.uYou can change the opacity of your changes.

uLayers are broken into two sections, Sculpt and Paint.
uSculpt is where all the physical modification layers to your mesh are.
uPaint is where all your paint effect layers are.
uALT + Mouse MovementuRotate around meshuALT + Tablet Pen MovementuRotate around mesh
uALT + Middle Mouse Button Click + MovementuMove camera up, down, left and right
uMiddle Mouse Roller MovementuZoom in and out towards and away from mesh
uALT + Right Button Tablet Pen Hover, left and right movementuHover pen over tablet while holding down right button click and move left and right to zoom in and outuALT + Right Mouse Button, left and right movementuZooms in and out


uHave a play with the different sculpt brushes.uuHover the mouse over the tools and wait for the tool tip to show you what they do.
uAfter the play around, use snipping tool to grab a screenshot of what you have done.uPlace this in the BVA100 Dropbox folder to show the class.
uY:\Visual Arts DropBox\BVA100\Digital\Mudbox\uIncreasing topology.
uAdds more polygons to give smoother adjustments and more detail.
uRequires more computer power to process high poly counts.
uShift + D to add a level (quadruple polygons)
uPage Up or Page Down to cycle through levels.


uBottom right of the Mudboxwindow will have a few tabs, one which is labelled Lighting Presets.
uHover over them to see what they are. The default is the 4thone across.

uSave your scene (as a .mud file) if you wish to edit in future.
uWe will cover exporting to Photoshop next week.
uPainting on to the modelsuUsing Stencils to paint faces on to a modeluUsing Stencils to paint a logo on to a model

uThis time open up another presetof your choice and have a go and modifying the object.
uBefore the end, take another snipping tool screengrab and put in the Dropbox folder with your previous file.
uY:\Visual Arts DropBox\BMA142 2016\MudboxPracticemost occasions.
My Strange creation:


Comments
Post a Comment